Thoughts on Wood – Pine

This post dates to this week two years ago. I’ve added just one or two additional comments that reflect how my thoughts are developing:

A professional carver who gives internet lessons on carving commented online to a student that pine was not a suitable wood for carving, get some good basswood was the advice. I laughed at this. Pine was the go-to wood for several generations of New England ship carvers, and the lines of many a schooner’s hull were carved first as half hull models out of our regional white pine, not to mention figureheads and much of the work of John Haley Bellamy. Pine is terrific to carve is you are mindful of its character and use sharp tools.

Here is a pine paradox: southern yellow pine can be harder than many hardwoods, and was once widely used for pattern making and shipbuilding. In the ’70’s I was gifted with a section of southern yellow pine that had been a beam in an old factory. Cutting it up into carvable pieces was challenging. In that case, the sample was old-growth cut in the 1890s.

Regional variation, the environment in which the tree grew, how the sawyer cut it ( quarter sawn or plain), how fast it grew, how it was seasoned, and other factors all contribute to suitability for carving. For example, the transom eagle on the USS Constitution is ponderosa pine. These days ponderosa is better known for its use as structural wood and not for its use in carving. In 1910 the old-growth ponderosa selected by a Philadelphia shipyard carver was not exceptional. The ponderosa chosen was sturdy, hard for a “softwood” and tight-grained. Until the Constitution maintenance shop carpenter told me about the carving as he worked on it, I’d never have thought to select ponderosa for a project.

This Transom eagle on the USS Constitution was carved in 1901 from Ponderosa pine. At some point it was modified to allow a line through the lower section of the carving.

Another pine that you might be interested in trying is western sugar pine. It has a clean tight grain and a distinctive sweet odor. You may need to shop around for this, but won’t be disappointed in the real deal. I carved this little eagle out of sugar pine and loved the experience.

A few words of caution on technique while using pine: it can seem like a good idea to try to “hog out” wood fast with a large gouge and a mallet. If you are hollowing the wings of an eagle for depth and shape, this can be a temptation. In fast grown pine, this is a mistake. Your gouge will tend to dig into the grain, and if you attempt to wedge it out, the grain will tear out deeply, leaving you with a rough and deep tear in the wood. Be gentle. Remember going fast is not always going to get you there sooner.
Another issue can be cuts that run on a bit further than intended. The answer to this is less force and more finesse on the cuts, If you are using a mallet switch to a lighter one or use your palm. Some years ago, I took a knot of elm from the firewood pile and fashioned it into a palm mallet. The palm mallet protects my hand from impacts while allowing me to get a bit more force into a cut.

A final observation is that much of the pine we get these days is very fast grown. I’ve found that in doing the finish work it’s not a bad idea to use some shellac to seal the wood for any light sanding you are going to do. Also, if the wood is extraordinarily soft the sealer will penetrate the end grain, and make the final finishing cuts easier and more precise. Remember, sharp tools will make your day.

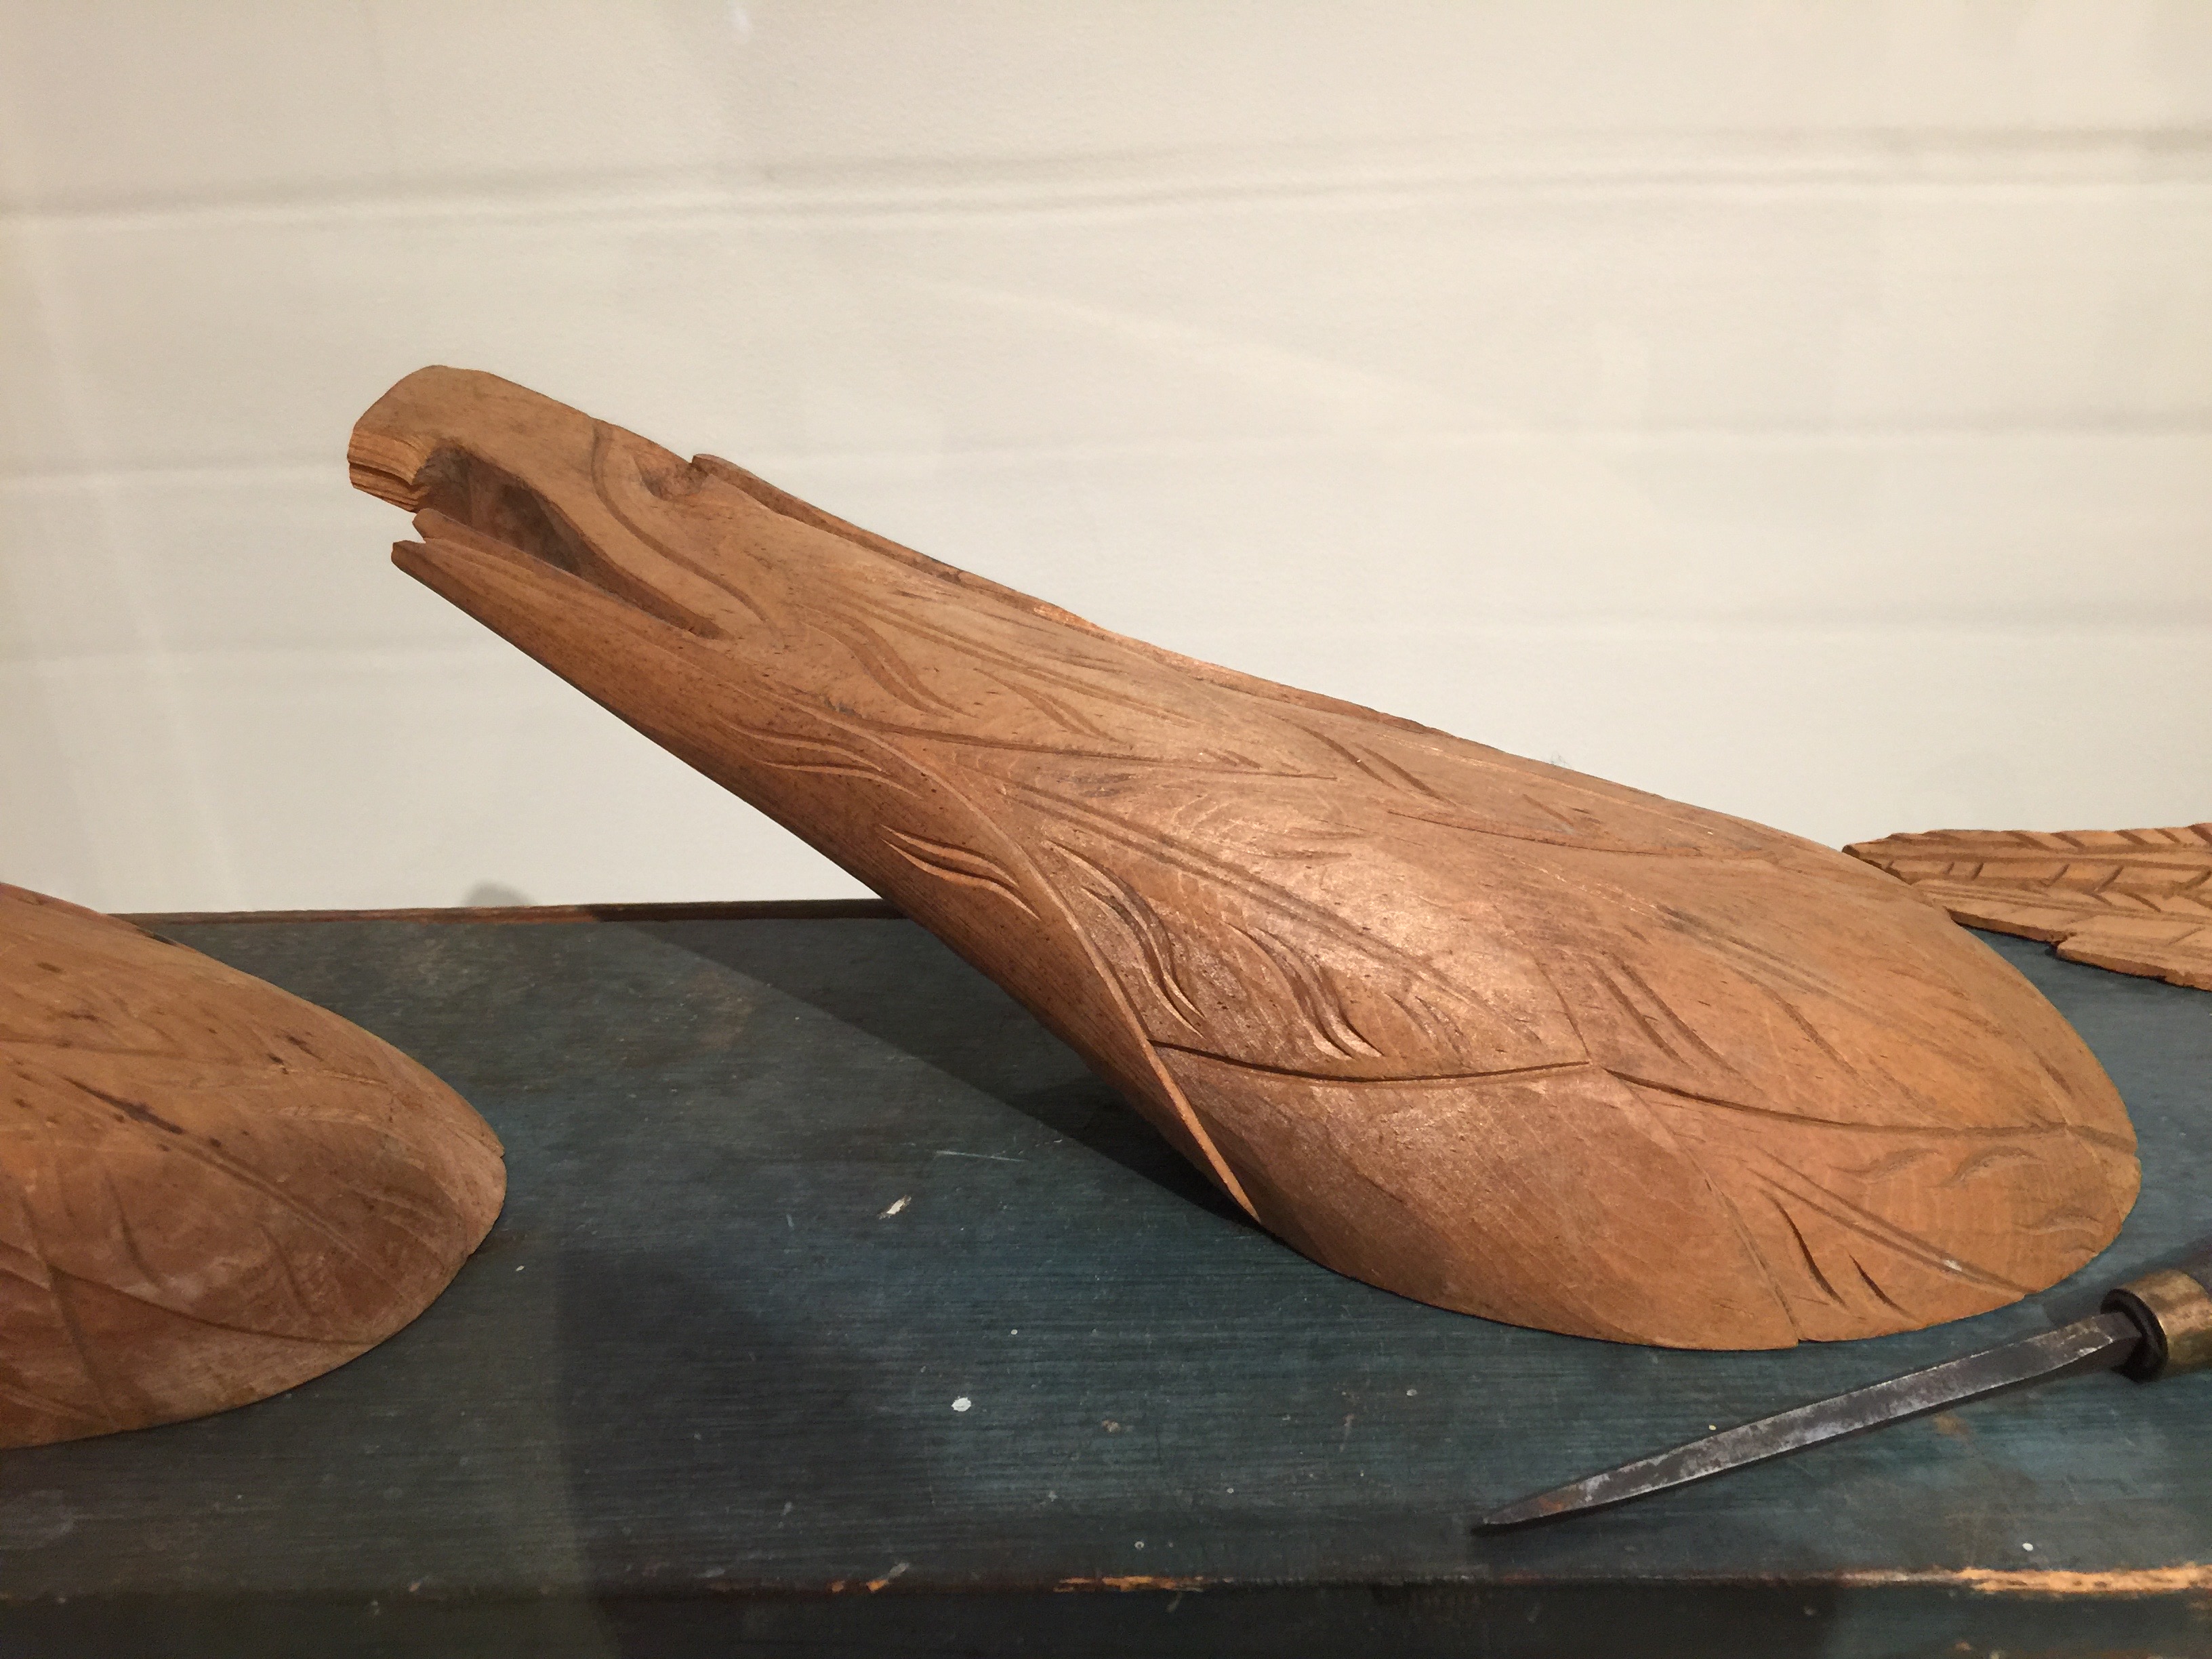
Pine is a worthwhile wood for carving: It’s readily available in a variety of species; many times, it will be the economical choice of wood, and with sharp tools can yield a rewarding carving experience.

Work Smart

If you buy too many woodworking magazines, you may develop shop and tool envy. Acting on this envy is a danger to people with “disposable income.” Professionals accrete tools over the years. The fiscal realities of running a business constrain them. Hobbyists with cash are under few restraints unless a partner points out the household does indeed have a budget. 

If this sounds harsh, I can illustrate my point with the example of one hobby carver who owned every single Pfeil ( Swiss Made) tool the company manufactured. At that time in my professional practice, I had maybe twenty of their very excellent tools. Each gouge, chisel, veiner, and v- tool, in mint condition, was racked under workbenches costing thousands of dollars. He asked me to show him the most useful tools for the work he was doing. I pulled out a dozen that would fit ninety-five percent of his needs.

Friends, I am no stranger to tool lust and tool porn. But limits are needed.

So what do you need to start? I advise you to take a look at the material I’ve provided for beginners. It has information on tools and good books to get you started. Here are some things to think about:

1.) Spend time planning your lighting. Lots of attention gets paid to bench construction and purchasing tools. But lighting is a need that gets ignored much of the time. I prefer daylight LED lighting bulbs and bars; they are inexpensive to buy and run.

2.) Don’t buy more workbench than you need. Benches can cost thousands of dollars. In my opinion, most of the commercially available workbenches were designed for cabinet and furniture makers, not woodcarvers. One of my early mentors in Baltimore was a sculptor who did all his work from a simple carving stand in his kitchen’s corner. Also, if you are doing small carvings, a large bench may be overkill for you. My current workbench is from Harbor Freight. I bought it for $125.00 and modified it to fit my needs.

3.)Cloth tool rolls are cheap, they’ll protect your tools between uses. Very little is worse than finding an assortment of valuable tools ruined because they were jumbled together in a box. Most of my tools are in racks, but if you only have a simple tool kit, the cloth roll works best.

4.) Be wary of specialty tools. They have exotic names like back bent, Macaroni, scorp, or hook knife. Until you need them, and that may never happen, keep it simple.

5.) The internet is now full of beautiful appearing tools from “artisan” tool makers. Not all that shines, and is artisanal is a good tool. In the beginning, buy from established sellers and manufacturers.

Most of my woodcarving gets done in an eight-by-ten greenhouse/workshop that I share with our overwintering figs, rosemary plants, and a shop supervising cat. What you’re making might be the best guide to what you need. I don’t require too much space on the bench, but I do need lots of light. The greenhouse is the best environment for me. If you are making and carving large chests, what’s ideal for me won’t work for you. I also have lots of tools ( including the aforementioned special tools). Like most professionals, I bought them over a long period, 1969 to now. The one with the most tools does not win anything except a large debt.

Working smart is one of the “secrets of the masters.”

Hope, Trust, Faith

Hope and trust rank high among the words woodcarvers should use regarding the raw wood they work.
You hope that the flow and twists of the wood enhance the finished product. You trust in your skills.


Since wood is a natural material, the flow of grain makes the end products appealing. You’re not just carving a block of plastic, after all.
Often you can’t see the end product hiding in the wood. You need to make leaps of faith, so faith is another word woodcarvers should use.
If you are uncomfortable with hope, trust, and faith, perhaps woodcarving is not for you.

Influences

Little things can alter the path we travel as craftspeople, and opening ourselves to new influences is vital to keep our work fresh and exciting. And by exciting, I mean to ourselves – an artisan bored with what they do soon ceases to be one.
Looking for new influences was how Antonio Jacobsen (19th and early 20th century Danish American Marine painter) changed my craft.
In November 1989, I was buying Christmas presents in a museum shop. I came away with a goody for myself too, a large-format postcard of a ship under sail painted by Antonio Jacobsen. The postcard wound up pinned to a bulletin board alongside my desk.
I was beginning to create portraits of ships and boats carved in wood and became fascinated by the late 19th-century “transition era” vessels. At that time, wooden hulls gave way to iron and steel, and sail became superseded by steam. It was an exciting time, and many of the designs were ingenious and beautiful. I eventually decided to carve that vessel, the Belganland.
I am not sure how many carvings like the Beglanland I’d want to do. It was laborious and time-consuming. Eventually, I decided to incorporate the carving into a large blanket chest. For years it was the signature piece on display at my boat show booths -priced high enough that I didn’t worry about selling it. It also served as the inspirational spark for other projects and encouragement to try new approaches.

Many artists and craft people restrict themselves to looking for inspiration in their media alone. Woodworkers look to work in wood, potters to ceramic, etcetera. Avoid that error. Groom your interests by getting excited by what others are doing as well. It may very well yield an inspirational spark you were not expecting.

Prototype January

January is prototype month in my small carving shop. It’s the nadir of the shop’s cycle when I prototype ideas, designs and just play around.
This year, I’m spending time combining traditional carving skills with complimentary work accomplished on a laser cutter/engraver. Some things have worked very well and have generated further ideas for thought and practice, and some have been disasters. The photo shows some of the projects on the bench right now.
My greenhouse is the carving shop, and it receives lots of natural light that I enhance with LED lighting. The combination of the light and woodcarving projects helps abate seasonal winter blahs. The greenhouse is the wintertime home to plants needing a cooler climate than the house; I work with the scent of rosemary and other plants in the air. Small, yes, a bit messy, That too. But an environment encouraging creative processes when I would otherwise be at a standstill.


We all deserve the best creative environment we can get. Most often, we make compromises. Unless you’re in cabinetmaking, space may not be your critical need. Besides space, you need time to experiment. I strongly suggest finding a low point and filling it with creativity.

Bad Show!

 Craft shows in the day, for me the 1990s, could be an “interesting” way to turn up a few dollars. You had to be careful in selecting the dates, venue, and most especially the show producer. Too many shows in one compact area on the same weekend could kill sales as severely as a hurricane or unpredicted snowstorm. Once you paid your money for a ten by ten booth, it was gone unless the producer canceled the show.

Shows ranged ( back then) in cost, from a twenty-five dollar local church fair to mega-extravaganzas at a convention center or resort area for hundreds of dollars. I assume that fees have continued to inflate since then. 

 A good producer selected quality locations, juried applicants, and made sure that there was variety in vendors. As craftspeople and vendors, we were interested in making sure that if the application form stated that the crafter must make everything themselves that it was so. After you were in a cycle of shows, you got to know the other craftspeople. Through them, you heard about who to trust and who to avoid. 

After a while, the awful producers would get you on their mailing list, and flood you with unwanted applications to their substandard shows.

Many shows advertised handmade crafts, but the producer had stuffed the show with Made In China, Pakistan, and Indonesian knock offs. The five real craftspeople placed near the entrance lost sales to the cheap imported “crafts.”

I wish I could say that if you stuck with known producers, you were safe. But, as in the rest of life, safety is always a relative commodity. 

Here’s a case in point. Several of my peers and I had heard about a show happening on a summer weekend in a resort area north of Boston along the shore. The producer was a well-known craftsperson with an, especially good reputation. The fee was substantial, but we thought that this would prove to be a good show: a suitable venue, date, fair jury process, and well-known craftsperson as a producer. It was a bomb.

First, after we set up, we learned that the gate fee was high. In addition to the gate fee, there was an additional parking charge. One or the other was to be expected, but both were sure to dampen attendance, and so it did. As the first day wore on, craftspeople started talking, and it came out that little advertisement had preceded the show. By the end of the first-day, anger had begun to grow.

It was a lovely weekend, however, so there were hopes for Sunday’s attendance. Sunday morning can be slow due to church, and it can die early as people leave to go home. Most of your business comes in the time between eleven AM and three PM. Not at this show, people avoided it due to the double whammy fees.

Craftspeople are great at concealing how bad a show can be: ” Great show, I took in lots of deposits. didn’t sell much off the table, but lot’s of commissions.” Or “Tthe show’s real success will be in the next week when people start calling.” I know because I’ve used variations on all of these and more. But at this show, people were openly revealing that they had sold nothing at all. Things began to deteriorate when one by one, we all visited the producer’s tent to complain and demand our fees be returned. While she went to the bathroom, a floral artist created a wreath of thorny stems with the flowers cut off and left them on her seat. The note enclosed read, “leave while you can.”

Leave, she did. Her booth canopy was abandoned in place. She fled with only her paperwork. I presume she left with the meager proceeds from the gate and parking fees as well. It was the only time I’ve seen a producer exit the show before it closed. With the producer gone, we all rapidly packed and left as well.

It was the worst show I had ever done, and an excellent object lesson that bad things happen at events, even when all the signs for a great show seem to be there.

Storyline

<p class="has-drop-cap" value="<amp-fit-text layout="fixed-height" min-font-size="6" max-font-size="72" height="80">It's not my most technically astute piece. It's just common pine, and it was done early on in my box making phase. The little box with the sloop on it kicked around for a while. I took it with me to a Salem Maritime Festival one year to fill out a table, and it and a similar box sold to a North Shore ( in Massachusett's that means along the coast north of Boston ) art teacher who said she liked them because they had a story.<br>It took me a while to think about it because it had been a long time since I had carved the scenes for the box lids, but there was a storyline involved. The little sloop is close to a disastrous jibe, and in the tempest, it is sailing in it will probably lead to a knockdown – the sort of scenario that haunts every sailor's dreams. But careful seamanship might still save the boat from disaster.<br>So all contained in one carving is a small dynamic story. You are entering the story in the middle. But from the waves and sky, you can conjecture the beginning. You can see that depending on the abilities of captain and crew, the outcome will be a disaster or a victory. To some extent, that outcome is yours to imagine.It’s not my most technically astute piece. It’s just common pine, and it was done early on in my box making phase. The little box with the sloop on it kicked around for a while. I took it with me to a Salem Maritime Festival one year to fill out a table, and it and a similar box sold to a North Shore ( in Massachusett’s that means along the coast north of Boston ) art teacher who said she liked them because they had a story.
It took me a while to think about it because it had been a long time since I had carved the scenes for the box lids, but there was a storyline involved. The little sloop is close to a disastrous jibe, and in the tempest, it is sailing in it will probably lead to a knockdown – the sort of scenario that haunts every sailor’s dreams. But careful seamanship might still save the boat from disaster.
So all contained in one carving is a small dynamic story. You are entering the story in the middle. But from the waves and sky, you can conjecture the beginning. You can see that depending on the abilities of captain and crew, the outcome will be a disaster or a victory. To some extent, that outcome is yours to imagine.

A comment made to me about this carving a few weeks ago got me thinking about how and why I carved it. My style changed based on what clients wanted in their boat and ship portraits – more pacific treatments of boats effortlessly sailing on calmer seas. But I think I’ll print a copy of this picture to hang in the shop to remind myself that other approaches and techniques work and that they tell stories.

Just Right

I had great difficulty learning to carve incised letters. It had nothing to do with the technique and everything to do with my perception of depth. My mentor, Warburton, overcame this by teaching me a popular method with German carvers. Using the profiles of the curved and straight tools, you make a series of stabbing cuts. By using different tools, you create individual letters, then words. The system works fine for small inscriptions. You need a comprehensive set of tools with all the curves and such to make it work well. Once I was away from Warburton’s shop and hundreds of tools, that system fell apart.
If your toolset consisted of about seven tools, as mine did, that system is impractical. It can take years for a carver to acquire a comprehensive set of tools. Proper tools are not cheap, and I wasn’t flush with funds. I had to develop an alternative that was economical in terms of tools needed, but that also looked good.
An advantage to a limited toolset is that you become adaptable, and learn how to extend your tools through technique rather than searching the tool rack for just the right tool. That method was what helped me stumble upon what I called the bolster method. After the sign was designed and the typography was drawn ( that’s how long ago this was – no computers for typography), you took either a carver’s firmer ( a chisel sharpened on both faces) or a knife and outlined the letter with vertical cuts. On curves, you used curved gouges or a knife. Using cuts of about forty-five degrees, you then cut around the letter. The key to making this look good was your cuts’ accuracy and how you finished the sign after the cuts were made. I’d varnish the sign. And then paint the sloping cuts one color and the body of the letter in some complementary color.
I abandoned this method once my depth perception for letters snapped in one day, and left me wondering where it had been hiding.

I forgot all about the method for years. One summer, I was teaching a course in carving in a town near where I live. One of the students was a gentleman who seemed to have an inability to grasp letter carving. Your cuts need to be at a consistent angle. His were never the same angle twice, and as a result, his lettering was beyond redemption. None of the practice exercises helped. At last, I demonstrated both the method Warburton had shown me and the bolster method.
I had ten students in the class, and they were all eager to move onto carving an eagle. I assumed he’d experiment after class.

About a year later, I received a call from my former student, asking me to visit and see his “carving studio.” Curious, I agreed. He had put up a beautiful shed that he had lavishly customized into a carving studio in his back yard. Inside was a workbench that I recognized from a top tool seller’s catalog. It retailed for about a thousand dollars. The racks below the bench held every single tool manufactured by the Pfeil company, an expensive Swiss tool company. Where I have perhaps forty of their gouges, he had bought out their entire collection. I asked him to show me some of his work. He pulled out a beautiful piece of Honduras mahogany marked up with attempts to letter in the bolster method. No two cuts were consistent. He then showed me another board lettered in the German method Warburton had shown me. It was passable, but barely. “Well, Charlie, what else have you been doing?” His reply: “I had to get the shop set up first, then the bench needed assembly, and It took a long time to order and rack all the tools. So I’ve just started. I was thinking of taking an advanced course with you.”
We sat down in the shop to kill for and had some cold drinks. Last year he had sold the software venture he was part owner in and now had time and money to pursue his passion, carving. Trying hard not to hurt his feelings I attempted to explain that he was not ready for an advanced course. I went over to his tools and gathered seven tools. ” A Scottish carver named Sayres wrote a great book on carving that only uses these seven tools. You can attain incredible mastery by working with his methods until you master them. Then you’ll be ready to use the other tools you own.”
It didn’t go down well, and I got up to leave. On my way out, he yelled at me: ” I’ll do fine on my own! I don’t need to work with turkeys like you!”
I replied: “There is an old saying – ” sometimes you have to fly with the turkeys, before you can soar with the eagles.” – so goodbye.”

I was glad that I had had to work long and hard with my few tools. Most carvers, I know, have lots of tools. They collect around you over the years like metal shavings around a magnet. But walk into a busy carver’s shop and look at the bench. She or he has about a dozen that are used all the time. Rather than searching for just the right sweep of gouge, you make do with your favorite.

A shop with all the tools neatly racked, and no chips are like a clean desk—a sign of a sick mind.

Love and Hate

Warburton knew I would never be a great designer. So he tried fundamental things with me—white space to balance designs and rule of thirds. Being he was an ecclesiastical carver, he was very concerned that I understand the traps you fall into when your block limits you to a constrained and stiff composition. There is no rule that he taught me that I have not broken on my own until I, finally, said, “that’s what he meant.” Well, at least I learned the lesson. It is the curse of the self-taught that our learning process is irregular. Good designers know when and how to bend and break the rules. I think that’s one of the things that makes great art and craft. The rest of us stumble until we get it right.

Kingfisher II

The photo I am showing here is one of my favorites, despite its apparent flaws. It was a practice piece that I liked. After it kicked around the shop for a couple of years, I decided to frame it. Being that it was an odd size, I made the frame from scrap around the shop.
The frame overwhelms the carving in color and size; and the piece ( being meant for practice) never was designed to have a proper border around it. Every time I look at the carving, I get reminded of how pleased I was with the effects of carving in cherry, and how much I liked the steam fishing vessel it represents. I also get irritated by the lack of compositional balance caused by the lack of space around the ship.
Because of the good and bad of the design, it’s a piece I love and hate.

Practice

I almost put on my hakama* without putting on my obi. The arthritis is bad enough to force me to do standing kata, but after two months, it feels great to be practicing – remember the Katana is long, but the ceiling low. Sword cuts in the ceiling are not allowed. Must not upset she who is not to be trifled with.

Covid-19 knocked me out for only a week. I had a mild case. But the recovery has been long, very long – weeks of low energy levels and fatigue.

Today though, I cleared the living room and slowly moved through three sets of standing seitei Iaido. I was tired, but not entirely out of breath. Eventually, the dojo will reopen, and I don’t want to be the one in the corner panting because the long layoff from practice has sapped my strength, although it has. 

The problem with long periods of no practice is that you think you are doing great, but then realize that your technique has atrophied. Like other forms of art, there is a fugitive component that you struggle to keep at bay through regular practice. I’ve had similar issues when I’ve stopped carving for periods. “how the heck did I do that?” Because so much of both those arts are tied to muscle memory, you can lose it if you don’t use it. 

Sometimes it’s interesting as you work back into things. You get little bursts of “beginners mind,” and you can use those to restore freshness to your work. You have an opportunity to avoid old harmful patterns – if you are careful.

Notes for those who don’t do Iai:

The hakama is a sort of divided pantaloon that was a typical style of dress in feudal Japan- being that Iaido is Japanese swordsmanship we dress in that style.

An Obi is a broad, very long belt that we wrap around our waist beneath our hakama ( but over our short jacket called a Keikogi).

Kata is a pattern of practice. In the case of Iaido, a pattern of sword cuts and movements that mirror a combat situation. Iaido gets practiced solo.

The Katana is the long Japanese sword used by the Samurai. It takes years of dedicated practice to master its use.

Seitei Iaido is one form of Iaido. In my dojo, we also practice a type called Muso Jikiden Iaido – another school of training. 

dojo is a place where you learn and practice Japanese martial arts.

Contact me is you want to know more.

%d bloggers like this: