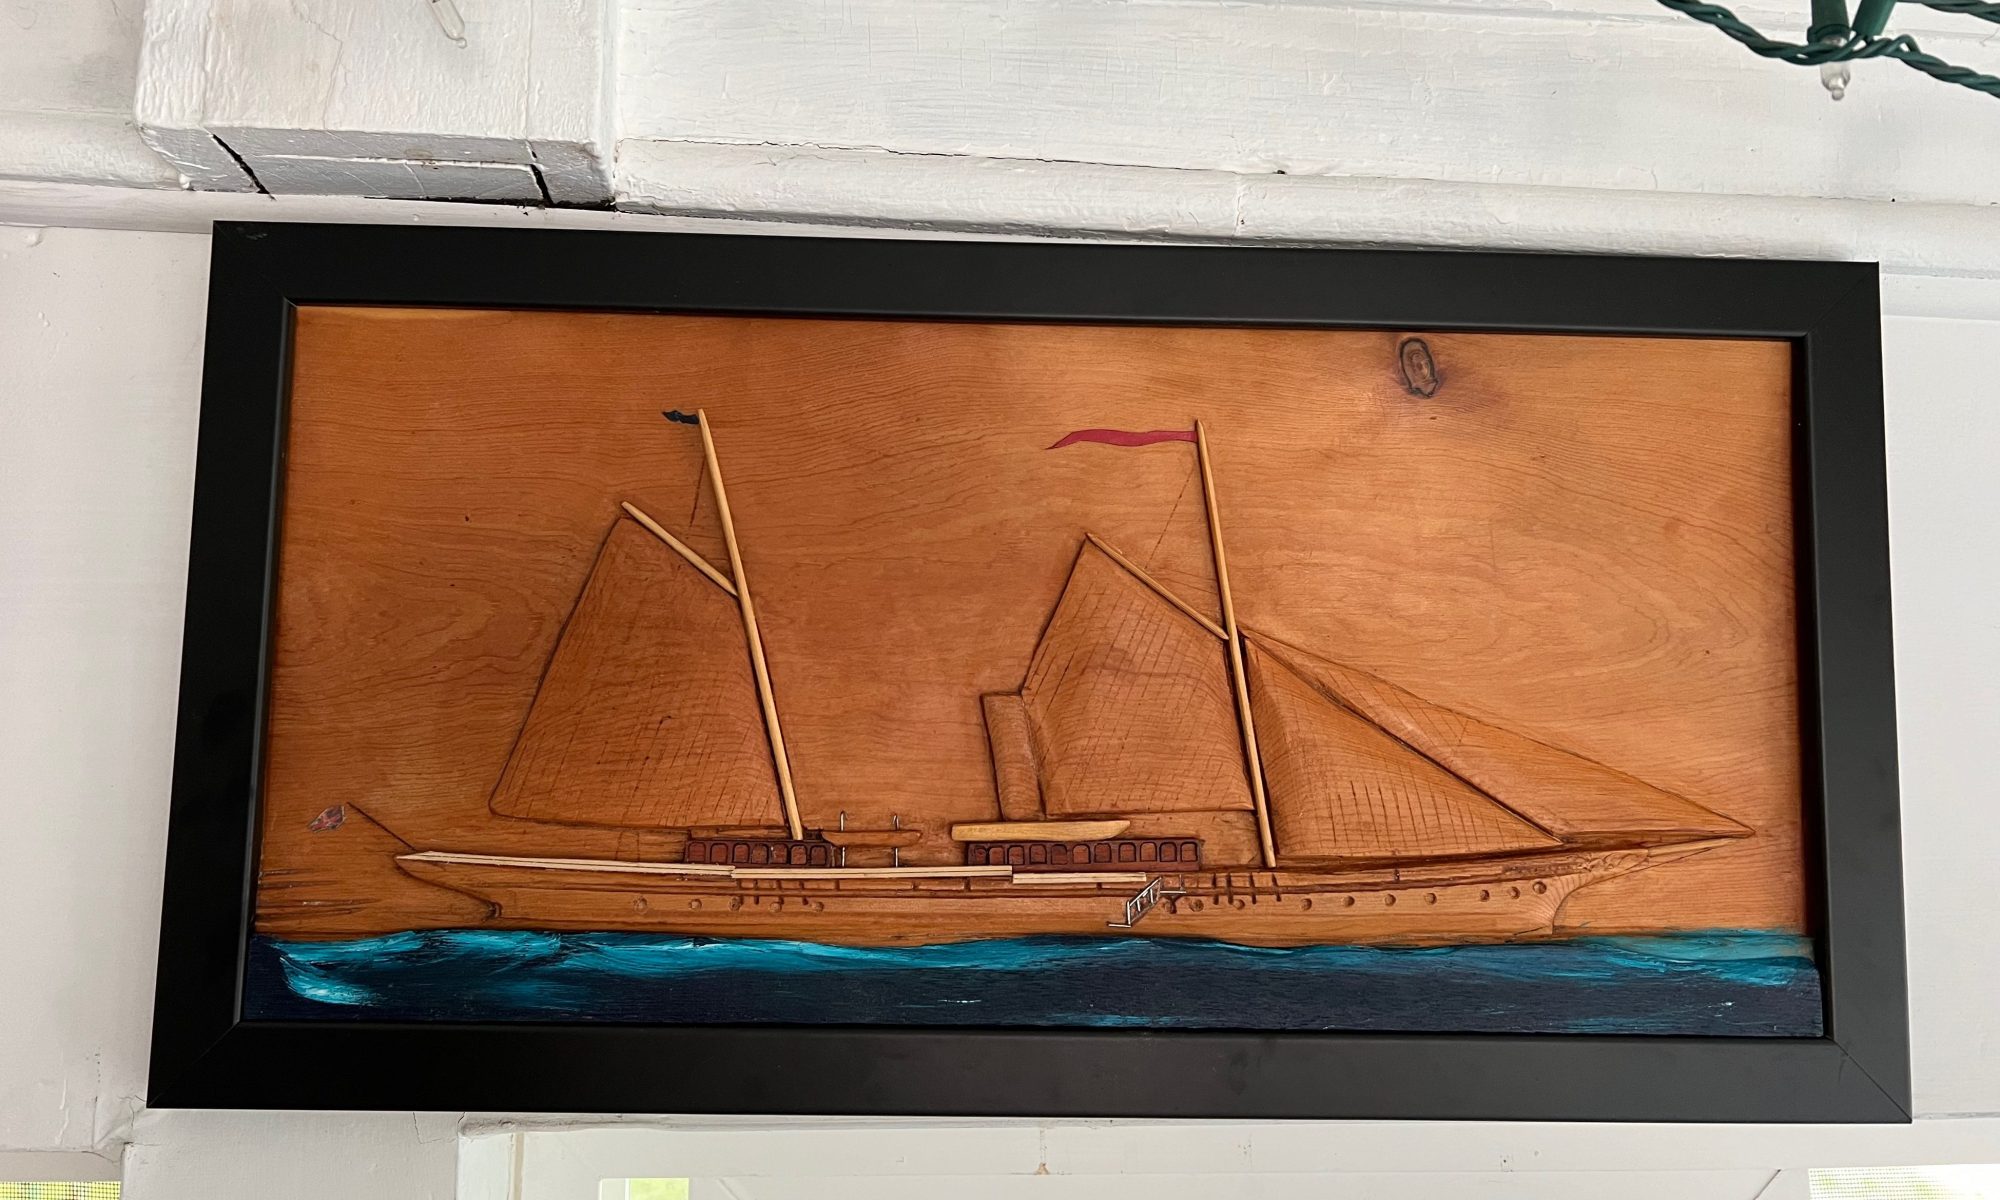
A Bowl Begins

Daily writing prompt
What have you been working on?

The shop is overwhelmed with chips, dust, hunks, and piles. There are piles of half-done projects, which all need to be done by the beginning of December. You observe with a sly grin that to do that, I’ll be working until midnight every night. That’s too true, but I can be stealthy about doing quiet things like using the card scraper, writing notes, or applying finishes.

Right now, I’ve started the first of a series of reasonably large cherry bowls. I aim to have eight of these ready to go in December; with the grain pattern, I suspect some of them will be absolute stunners.

It’s been observed that there is a big difference between my two carving styles. One is the boat and ship portraits, eagles, and other carvings that I refer to as detail work. On the other side is the free-flowing work represented by the bowls, spoons, and a few different types of carving. Cutting boards just don’t fit in either category, though.

In terms of proportions, I probably produce a greater volume of the free-flowing items, but the detail carvings require more significant planning and execution. 

need both. After a detailed carving, I appreciate a more unrestricted form that allows me to play around.

The photos illustrate the early stages of carving a bowl. The fun thing is not knowing what will come out of it. Uncertainty can be a lot of fun, not in a portrait, but in a bowl; it’s part of why you are carving it.

The Shelburne Museum

Daily writing prompt
Tell us about the last thing you got excited about.

Sometimes, it’s just the little things that get you the most excited. It’s like a surprisingly wonderful French Toast at the Gray Jay restaurant in Burlington, Vermont ( OK, a shameless commercial for a place I like!). Or a wonderful morning at a museum.

It was the museum that made the day. Just outside of Burlington is the Shelburne Museum, and visiting there was a decade-long goal. But routes, jobs, and travels just never matched up. Finally, my sons arranged a “guys’ weekend out” for my birthday, and Shelburne was on the agenda. At the top of my agenda was the Ticonderoga, a completely landlocked Lake Champlain steamship restored to impeccable glory. I looked into the staterooms, the officer’s quarters, and an incredibly familiar Fo’casle ( forecastle to you lubbers). The pipe racks ( beds to you flatlanders) were almost identical to those I slept on in the Navy. At the beginning of a deployment, you might wet down the canvas bottom to conform to your body. Under the mattress, you could carefully press a uniform into regulation creases, including underwear. More memories came into play at the next stop as we inspected the boiler. At age ten, my dad, a marine engineer, had me assist in re-tubing the old steam plant that heated our apartment building. It was close enough in design that my dad’s advice on shoveling coal onto an established coal fire returned, and I could almost see the scintilla of hot coals in the old firebox. 

Woodcarving is one of my things, so we next visited the galleries with the carvings. The Shelburne had many items I was completely unfamiliar with or had only seen in photos. Downloading a photo from the internet is vastly different than seeing the original. As a carver, I’m probably as interested in the details of construction and carving as I am in the total work itself. For that, there is nothing like an actual viewing.


The Shelburne has thousands of interesting pieces in its collection; I’ve only mentioned the few I was most excited by. I admit to being a museum freak, have memberships in several museums, and will hunt out interesting places on my travels. But this was truly someplace special.

Curves

It’s just a roll of brown contractors’ paper. About twelve dollars a roll. It’s probably one of the most basic tools in the shop. And at that price, it’s one of the cheapest. But I couldn’t do much of certain types of carving without it. 

Not everything is computers these days; you have to draw something out sooner or later to see if it fits and looks good. You could draft this on a computer, run it off on a large-scale printer, and then play with it. But using some Copenhagen Ships Curves, French curves, brown paper, and scissors to make this template was easier and cheaper to do.

You’ll find that a good pattern gets stored against future use. When doing this sort of stuff, do the intelligent thing, save the turmoil of digging through a collection of similar items, and label things like date created, project, customer, and vertical or horizontal orientation. How do I know? Let’s say it falls within the category of do as I say rather than as I do.

The second photo shows that this banner will have a significant amount of relief and curvature. I could do that with a thick piece of wood, but that’s pretty wasteful, expensive, and not necessarily the best approach. In this case, the ends are glued up from two pieces. I’ll carve them into curved shapes as needed. There are a few ways to make this sort of banner work. The easy way is to keep the area where the lettering will go flat. But if you wish to live dangerously, make all the surfaces curved. If you go the curved route, you’ll need a paper template with printing to naturally alter the lettering to fit the curvatures. Someone better at drafting might be able to freehand this, but I like the security of the pattern. The final photo shows how this effect came out on a large banner I did years ago.

No fancy tools, no drafting programs. Just brown paper and pencils. Amazing what technology can do these days.

Lots of Tools

Craftspeople accumulate tools and supplies, and some of us could use the help of the tool police to keep us in line with purchases of new bits and pieces. But the current project on my bench proves I eventually use all I accumulate.
The carving currently occupying my workbench is of the schooner Ada Bailey*. As depicted, she is on a starboard tack and is slightly heeled over to port. This means that the observer can view parts of the inside of her starboard ( right side) rail.
It’s straightforward to portray a hull flat on the water, and most times, that is the favored view. In this case, I have to show that rail which adds depth to the carving ( about an eighth of an inch) and makes it necessary for the groundwork behind the vessel to be cleared even deeper. Fussy, fussy, fussy! And a bit of a pain to carve. Out come all the little U-shaped veining tools that hardly ever get used and the tiny rifler files to clean up the odd whisker of wood.
Shaping the sails and hull? No problem. Getting this little bit of perspective correct? Well, it’s getting there.

*Little survives of Ada Bailey. Built in 1884 in the Sewall yard in Bath, Maine, for the A. Sewall Company she foundered ( probably ran aground) in 1894 – location unknown. I’m basing this carving on the 1888 portrait of the vessel by Antonio Jacobson. It seems to be the only rendering that’s survived.

Noodling Around

It was a cold February afternoon, but the sun made it very pretty. Not having much to do, I worked on the portrait of the schooner Ada Bailey for a while. I then made some hair sticks just to see what sort of easy adornments I could come up with without too much fuss. I don’t like the burned in flower; too irregular. But I think the feather designs can be developed. My wife now thinks that I have the thickness and length correct. She wanted the wider top to aid in placement and removal. These six are a mixture of native cherry and mineralized maple. No stain has been used, and the finish is pure tung oil rubbed in and dried. I prefer the look of the cherry; the cherry will darken up a bit more if exposed to the sun.

I’ll be developing the designs further over the next week.

Hair Sticks

My wife enjoyed the hair combs I’ve been making but wanted some hair sticks for her long hair. So I went into the shop this afternoon and whipped these up for her as an early Valentine’s Day present. In making them, I was influenced by 19th-century Japanese originals I had seen. While not slavishly following their lines, I let them guide the outcome.

I used my favorite native New England cherry for the wood, sanded to 400 grit, and finished them with tung oil.

My wife has promised to let me photograph her using the sticks next time we go out for dinner.

Moving forward on combs

Well, we are almost out of the prototype phase with the combs. We have broken many, learned a lot about finishing them, and experimented with shapes, tooth size, and spacing. I’ve discovered that sanding to four hundred grit is sufficient for a smooth feel.

I am using food-grade tung oil for the finish. Right now, they glisten because the oil is still soaking in. Tung gives a soft, lustrous, and durable scent-free finish once cured. The oil I am using is not the same as in teak oil formulas or other finishing products. It is just pure oil without any additives. However, I am also testing other food-safe alternatives. My final choice must be non-allergenic and protect the wood. Right away, any number of food oils might spring to mind, but as in finishing spoons, you do not want to use anything that might turn rancid.

The small designs were added using my laser engraver. Using the laser, I can also add names on the combs.

My next post on combs will be the last as I develop these ideas into actual projects.

Boxes

I’ve had a thing with boxes. So when I restarted the woodcarving business, boxes with a nautical theme were among the first product lines I developed. I made boxes with sailboats carved on them, compass roses, small chests with carved boats on the lid, dolphins, and so on. I had an entire line of them at boat shows.

But they sold inconsistently. They did sell, but sometimes they’d stay in stock longer than I’d like and travel from show to show without selling. Not an ideal circumstance since my business plan has always been a small inventory and custom work. So eventually, I was forced to think outside the box and stop making them.

Only one problem. I still really like boxes, and despite my internal objections, I have purchased several jigs and appliances for less labor and time. After all, the carving is my interest, not the joinery.

Several designs, box blanks, and templates sit in the shop, waiting for the mood to move me to make some more. And I fear that I am fated to never really get out of the box.

Designers Notes

By my long-standing tradition, January is a month for working with the design book first and the workshop second. The book doesn’t look much like a designer’s book of sketches. Over the past few years, it’s become page upon page of post-it notes placed on the book’s blank pages throughout the year. As an idea or concept is suggested to me or pops up, the note gets put into the book for later consideration.
As concepts develop, notes get more elaborate – so much carving or finishing time or the cost of materials. Eighty percent of the ideas never go anywhere for one reason or another. Some I can’t develop at a reasonable production ratio of time, materials, and profit. Others have practical production problems that are waiting for a solution to be developed.

some notes will sit in the book for a few years, some forever. but I rarely discard any. Instead, I’ll go back over the older stuff periodically as a source of inspiration or to reinvestigate my thought processes on ideas.

At some point, an idea jells enough for a prototype. So some prototypes wind up in the project box waiting for further developments while I move on to other things. Some will eventually go to the scrap box, too.

Another part of this process is the project woodpile. The project woodpile is an undercover collection of assorted wood pieces that I’ve put aside specifically because something is appealing in them, and I want to use them in something. This is a boxed and shelved collection outside of my carving shop under cover. I root around in the contents frequently, looking for select pieces of Cherry, ash, oak, and other woods.

It’s a messy sort of creative process, I admit it. But from this constellation of sources, I eventually cook up ideas, prototypes, and projects. I’m under no pressure to create any specific amount of work in January, to follow this creative process, as sloppy as it may seem.

Since January is my most hated month, using it creatively is an essential strategy to avoid the winter blues.

Beating to Quarters

What skills or lessons have you learned recently?

Crafters and artists are constantly in motion learning new skills, altering perspectives, and looking for the next project that excites them. Tradition is fine, and working in a tradition laden with favored designs and techniques is also great. But boredom can set in and, with it, a creative staleness from doing the same old thing time and time again.

For several years I’ve been working on developing my skills in boat and ship portraiture. Although I’ve been doing the basics for years – your standard catboat, sloop, or little one-design sailboat- I’ve been tackling larger and more ambitious sailing vessels. The fundamental challenge is to carve a convincing portrait in about an eighth of an inch of relief carving.

This is easier when the wind is coming over the stern or aft quarter of the vessel but toward the viewer. Being a bit “chicken,” I avoided portraying ships as they might be viewed from aft, sailing away from the viewer. This year I created a design and tackled the approach.

The portrait was called Sloop of War and portrayed a small vessel of the Napoleonic Wars era that I imagine as Beating To Quarters to engage the enemy.
I have not solved all the technical problems with this approach, but that’s the beauty of new things. There is always more to learn and master.

%d bloggers like this: