Mastery

For several years I taught marine woodcarving at a boatbuilding school in Maine. The first day of my week-long class was typically spent teaching tool sharpening, basic knife techniques, and chip carving with the knife. On the second day, we moved on to lettering and carving a quarter board.

On day three, most people were game for larger projects and went into the backroom for relaxation and inspiration. I had set it up as a combination gallery and Library. So there could be found all the samples and patterns I brought and dozens of books on carving.
That day, a student approached me with a small eagle billet head. He asked me if I had freehanded the design on the wood. I had a pattern for this, but it was one of the few patterns left behind at home. Digging around in a toolbox, I pulled out a pair of proportional dividers. I demonstrated how to use them to measure and transfer the critical dimensions to wood. Then, he was off to carve a credible eagle head with some freehand drawing, the dividers, and French curves.
The next day he was back asking for advice on carving feathers without a peep about the technique I had taught him.

Almost Forty years prior in Baltimore:
In 1966, my friend Bill decided big money could be made carving Tiki statues for Polynesian-style restaurants. As the better scrounger, I was detailed to run around town and see if I could liberate free wood for our business. One of the places I wandered into while scrounging was the workshop of a master carver, chaser, and engraver. Let’s call him Warburton. After refusing my request for free wood, Warburton gave me a relatively complete description of his skills. He was had mastered many modes of chasing and engraving and was a skilled carver of religious sculpture. While he would not offer me the tiniest scrap of wood from his scrap bin, he did offer to allow me to clean his studio for free. Why would I want to clean an egomaniacs workshop for free? It must have been that he immediately began teaching me essential concepts in art and craft. He taught me about – Hagiography and Iconography on the first day. This was the beginning of Warburton’s influence on me; the gift of knowledge. For a time, I just thought he was weird. Warburton could tell you why Saint Cerbonius was always associated with wild Geese. What need did I have for that information?
I began to go to Warburton’s occasionally ( in those days, I did little regularly). I swept, stacked, sorted wood, and dusted the diverse casts, models, and half-finished works that seemed to litter the lower level of the workshop. There was also a substantial mezzanine ( another word Learned from Warburton)that also was full. Throughout all this, I was never shown how to use a tool or draw a line.
I was yelled at for stacking walnut with mahogany. Also for not stickering green wood correctly, not knowing what boxwood was, and its use by medieval and Renaissance carvers.
When this last became, apparent Warburton seemed to grow angry and told me to visit the Walters Museum and not return till I had been at least twice. I went at least four times dutifully to take in all the wonders that the Walters had to offer me. Leinberger’s Memento Mori in boxwood was exquisite, and the Walters has many more like it. 
On my next visit to his shop, Warburton was unimpressed and set me to sweeping up. Finally, he grew agitated and told me that proportion and perspective were the keys to artistic rendering. Was I familiar with Manetti, Vasari, or Brunelleschi? “Who?” Calmly Warburton walked me over to a workbench; this is it, I surmised. He’s really going to teach me the “Secrets of the Masters.” Warburton picked up a pair of proportional dividers and pointed to a small model. After showing me briefly how to set and use the dividers, he says: “Copy this. It’s one of the classic techniques used by all the masters.” He then walks away and says nothing else to me.

Back to Maine
The school I taught encouraged students to file evaluations on the courses they took and evaluate their instructors. With the student’s knowledge, the school shares the assessments with the instructors. Each class is one to two weeks of intensive work. During the week of my class, I worked very hard to ensure my students received the best foundational course in woodcarving possible. I’m pleased to add that I received outstanding ratings. That year among the praise was a brief comment from the student I had taught the dividers technique to: “I had hoped that he would spend time teaching us more of the “Secrets of the Masters.”

Bowls and Scrapers – Flashback Friday – August 13, 2019

Sooner or later, most woodworking sites and blogs have some sort of post on scrapers. Rather than duplicate what others have demonstrated in the care, feeding, use, and maintenance of scrapers. I’d like to point out that they produce much less dust than sanders – that’s a hell of a significant point when you have a confined shop and allergies. They also can give you a crisper, almost cut, finish. If you look at the picture of the bowl with all the shavings, you’ll notice that they are shavings, not dust. A properly sharpened scraper produces shavings.

In this instance, the birch short had been around the shop for about ten years. At some point, I had outlined a bowl shape on it. Last week I moved it from the maybe soon bucket to the on schedule bucket. A few days ago, I rough shaped the outer contours and took some latex caulk to the bottom. I used the bead of caulk to paste a pine cleat to the base; when I no longer need to secure the bowl in a vice or a clamp, the caulk will quickly release with some alcohol and a putty knife. Cleaning up the caulk is easy with the scraper. In the meantime, It will take all the rough handling I can give it while shaping the bowl.

Today, I needed a break from some other work, so I roughed out the inside of the bowl. A few years ago I would have done all of this with hand gouges. These days I use a variety of Arbortech ball gouges and Kuztall discs to rough out the bowl. Warning: these tools require a dust mask, face shield, glasses, hearing protection, and heavy-duty gloves. Not used with care, they will cause severe industrial injuries. But, in hardwood like cherry, maple or birch, they save labor on the rough out. I like to use these tools out of doors. They produce prodigious amounts of chips.

After roughing out, I used a relatively flat gouge to clean up the shape to the proportions I wanted. At this point, you might be tempted to get the sander out, and I won’t tell you that it’s wrong to do. It comes down to work style.

I reached for my scrapers and put in about forty-five minutes, smoothing out the inside of the bowl. When I thought I liked the result, I applied a bit of Turps to the wood and observed all the holidays, dings, and other imperfections I did not see while the bowl was dry. Another test is to close your eyes and run your fingers around in the bowl. If you don’t like the feel of a bump or a small divot, chances are that the client might not either. Closing your eyes to see is a much underutilized free tool. Tomorrow I’ll go back with a pencil and highlight the areas I need to fix before I start to work on the outside.

This is a carved bowl, not one turned on the lathe. I tend to leave more meat on the sides and bottom of these. My goal is not to make a fragile walled vessel, but one which has some substance to it

My final picture shows a selection of scrapers and scraper tuning tools. Not shown are my collection of little homemade scrapers; they are pretty easy to make to any pattern you desire. The scrapers pictured, and more, are available from a host of suppliers for a wide variety of prices. If you don’t have any, I advise that you buy a basic set from a reputable dealer, like Lee Valley or Woodcraft Supply. Most of the people who are disappointed in scrapers have not put the time in on learning how to set them up. I know, because for years I was one of them.

Proficient

Periodically carving becomes a fad and not a cheap one. Let me be transparent the terms cheap and good tools are an oxymoron. Good tools have never been inexpensive and won’t ever be. It’s for this reason that I used to cringe every time I’d make a tool list for beginning carvers. I wanted the craft to stay affordable for people like myself who couldn’t drop five hundred dollars on a whim. To counter the sticker shock, I’d always take additional toolsets to where I was teaching. After a while, I stopped doing this at some of the places I taught. If you could afford the tuition, you could afford the tool kit. Clever marketers have evaluated this pool of potential clients and have begun to offer a wide range of “handcrafted” carving tools on e-commerce sites catering to the crafts deprived. The tools look so beautiful! However, the forge that made them was probably just opened last year. That gouge will look so lovely on your bench, though.
There is more:
Few lumberyards or sawyers cater to woodcarvers; they tolerate us. We buy too little from them to indulge us; ten board feet here, twenty there. And then we pick through piles looking for just the right plank – not too much grain or figure- but not too plain either. Most of us in the trade haunt our favorite sawyer’s lumberyard in the hopes of finding some interesting pieces. Eventually, you might get a shed with wood ricked high against need. If not, you are the bane of wife or husband because your wood sits in every nook and cranny. For the dilettante, the internet has solved this problem with precut, milled, and packaged timber. You buy sight unseen or evaluated. You can buy lots of things this way, but you should have great affection for the wood you will carve. Would you choose a lover this way? If so, keep walking; this blog is not for you. You can join a Facebook clique where people will tell you where they bought their prepared materials and their artsy tools.
Most of us serious about our art or craft are fussy about our tools and our media. Can you produce good work with indifferently selected tools and materials? Sure. But should you? Learning about tools and materials is part of your overall tuition in art or craft. Why deprive yourself of the experience? Last year a manufacturer sent me the wrong tool. I complained and wound up talking to the toolmaker, not the clerk. The toolmaker promised to correct the error, but we spent almost an hour talking about how best to use the tool, machining, and tool steel. It was a not-be-missed opportunity. Likewise, taking a walk through a real lumberyard ( not a big box store). Ask questions and learn. The more you understand, the better your selection will be.
Using tools well is a central part of what we do in art and craft. The selection and knowledge of how our tools and materials get produced is another part of the picture. Don’t shortcut your way to becoming proficient dig into it.

Work Smart

If you buy too many woodworking magazines, you may develop shop and tool envy. Acting on this envy is a danger to people with “disposable income.” Professionals accrete tools over the years. The fiscal realities of running a business constrain them. Hobbyists with cash are under few restraints unless a partner points out the household does indeed have a budget. 

If this sounds harsh, I can illustrate my point with the example of one hobby carver who owned every single Pfeil ( Swiss Made) tool the company manufactured. At that time in my professional practice, I had maybe twenty of their very excellent tools. Each gouge, chisel, veiner, and v- tool, in mint condition, was racked under workbenches costing thousands of dollars. He asked me to show him the most useful tools for the work he was doing. I pulled out a dozen that would fit ninety-five percent of his needs.

Friends, I am no stranger to tool lust and tool porn. But limits are needed.

So what do you need to start? I advise you to take a look at the material I’ve provided for beginners. It has information on tools and good books to get you started. Here are some things to think about:

1.) Spend time planning your lighting. Lots of attention gets paid to bench construction and purchasing tools. But lighting is a need that gets ignored much of the time. I prefer daylight LED lighting bulbs and bars; they are inexpensive to buy and run.

2.) Don’t buy more workbench than you need. Benches can cost thousands of dollars. In my opinion, most of the commercially available workbenches were designed for cabinet and furniture makers, not woodcarvers. One of my early mentors in Baltimore was a sculptor who did all his work from a simple carving stand in his kitchen’s corner. Also, if you are doing small carvings, a large bench may be overkill for you. My current workbench is from Harbor Freight. I bought it for $125.00 and modified it to fit my needs.

3.)Cloth tool rolls are cheap, they’ll protect your tools between uses. Very little is worse than finding an assortment of valuable tools ruined because they were jumbled together in a box. Most of my tools are in racks, but if you only have a simple tool kit, the cloth roll works best.

4.) Be wary of specialty tools. They have exotic names like back bent, Macaroni, scorp, or hook knife. Until you need them, and that may never happen, keep it simple.

5.) The internet is now full of beautiful appearing tools from “artisan” tool makers. Not all that shines, and is artisanal is a good tool. In the beginning, buy from established sellers and manufacturers.

Most of my woodcarving gets done in an eight-by-ten greenhouse/workshop that I share with our overwintering figs, rosemary plants, and a shop supervising cat. What you’re making might be the best guide to what you need. I don’t require too much space on the bench, but I do need lots of light. The greenhouse is the best environment for me. If you are making and carving large chests, what’s ideal for me won’t work for you. I also have lots of tools ( including the aforementioned special tools). Like most professionals, I bought them over a long period, 1969 to now. The one with the most tools does not win anything except a large debt.

Working smart is one of the “secrets of the masters.”

Bricolage

Boat shops, and woodworking shops in general, are often full of patterns. You frequently build variations on similar forms. It’s easier to have templates available for these frequent repeats than starting over fresh every time. A carver’s shop is no different. I have a couple of gallery walls filled with examples I’ve carved over the past thirty or so years and numerous patterns for items I need regularly. The carvings themselves can be assemblages of pieces. The great carver Grinnling Gibbons created his massive works through assemblage, and where relevant, I do too.
The photo shows a maquette of an eagle with an applied banner. The design I based this on was a decoration on the paddle box of a very elegant 19th-century paddle steamer.

Several years ago, I carved this eagle from scrap wood. It has three pieces: body plan, head, and the attached banner. Could this be done in one piece? Yes, but it’s more straightforward and sturdy in three. A small model like this can be used with a pair of proportional dividers and paper patterns to get you pretty much any size eagle you need.

The second photo shows the small eagle with a duplicate I am working on for a house sign. Included are the patterns and prep work on the banner that has to lay across the caved eagle’s body. Patterns are lovely for layout, but a model is better for trying to get the flow of contours for things like banners or drapery.
The term bricolage is a French loan word for creating work through the assembly of various parts. While working on boat and ship portraits, I am a bricoleur combining model parts with individually crafted wooden components, paper, plastic, or metal. But even while crafting this sign, the technique creeps in.

Items like models, patterns and proportional dividers are as important to your carving as sharp gouges and knives. They form part of a shop production culture that continues to flourish not because it’s some historic affectation, but because it simply works.

Eagle Eyes

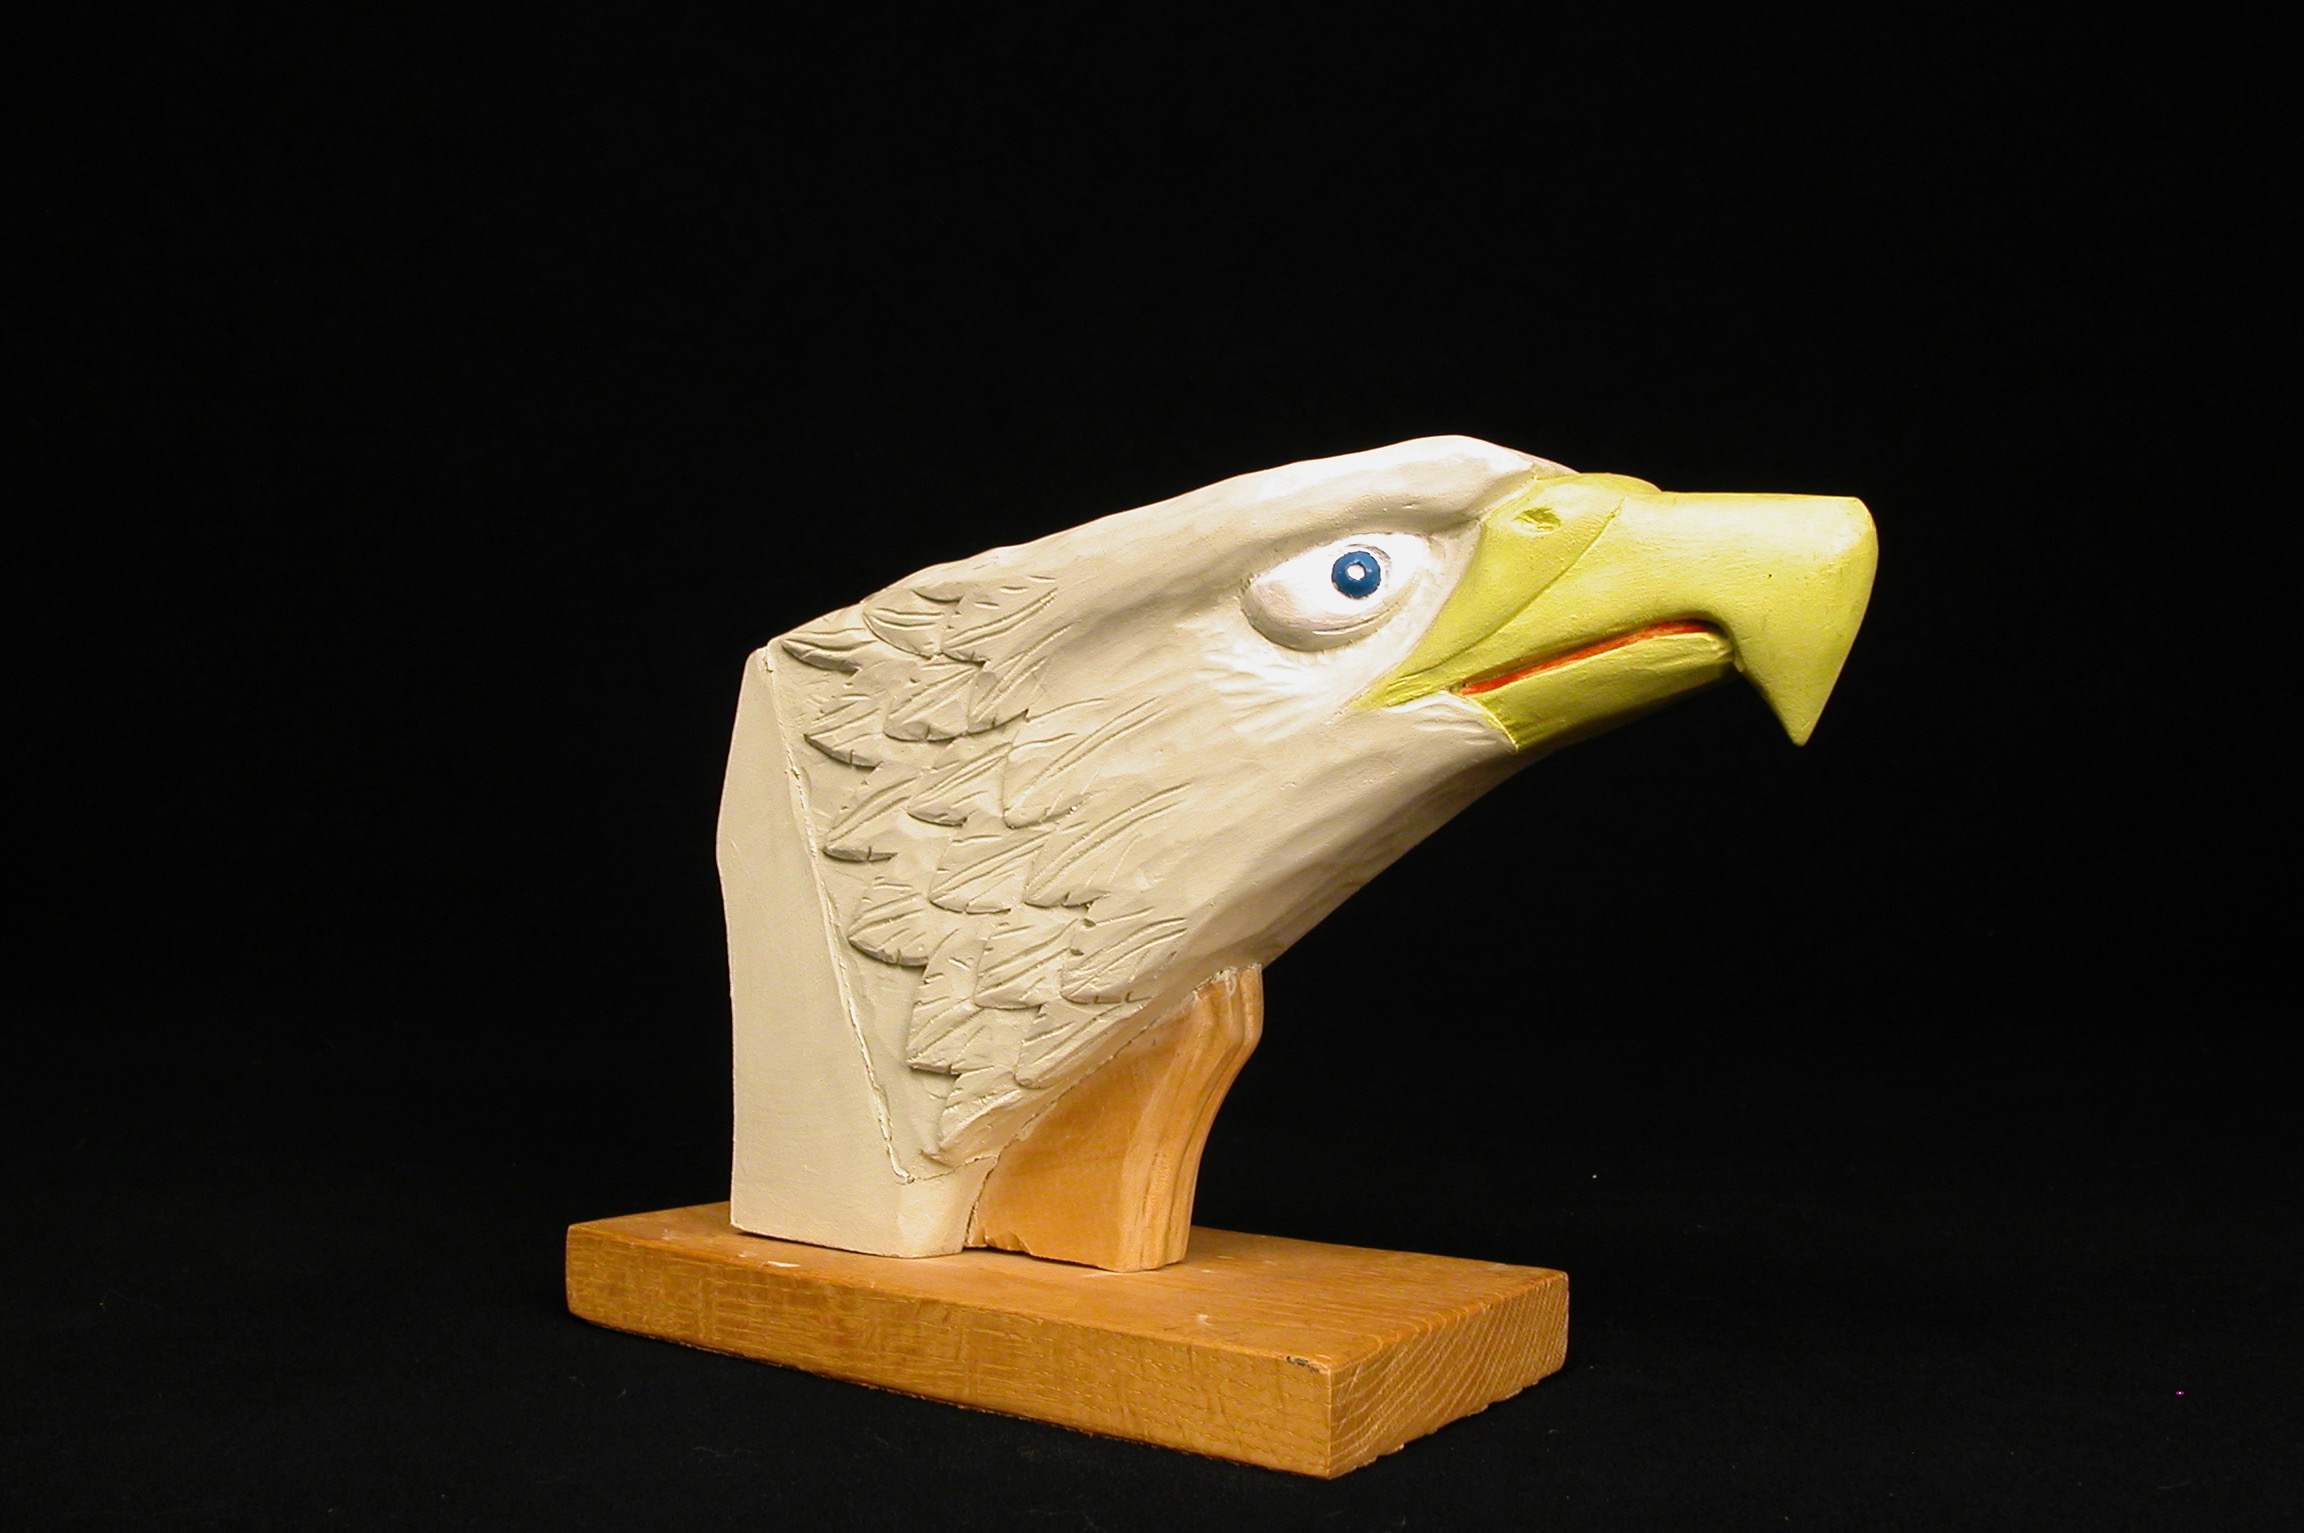
While teaching, I always like to decorate the workshop with carving examples for students to use as a reference. Week-long excursions to teach away from home mean emptying the house of many of my carvings. But samples in three dimensions often are better than pictures or demonstration, and the extra work was worth it.
During one summer course, A student was working on an eagle and suddenly stopped, got up, and went over to an eagle billet head. He picked it up and turned the head away from him. Noticing me watching, he shrugged his shoulders and said: “it was watching me.”
Smiling, I pointed out that he was perfecting the eagle’s body plan and feathers without working on the head, most notably the eye. He asked me why it mattered, and I told him that it was essential to fair the contours of the head and neck into the body, so the eagle looked all of one piece when finished. The head is temporarily attached to the body with a screw while you carve the neck fair to the body.
” But why was it watching me?”
Well, I explained, years ago, while I was first carving eagles, a talented carver from Boothbay Harbor advised me to always start the head before detailing and finish the eye first. There was a practical reason for this. The eye was a delicate piece of work, and if not done right could ruin the whole birdie. He then added that he had been taught to do the eye first so the eagle could oversee the carving’s remainder. ” As I was taught, so am I teaching you.” I then turned the eagle about so it’s beady eyes were on the student. ” Being that you haven’t done the eye first, this birdie’s cousin in watching you.” I can be a first-class pain sometimes.

I carved the eyes on that particular eagle with a “tunnel” eye effect. With that manner of carving, you could get the impression that the eye watches you and moves with you. To someone easily spooked, like my student, it could be an unpleasant sensation.
There are several ways to carve eagle eyes for traditional marine eagles. Please note that if you carve more realistic styles, these will not appeal to you. I’m a nineteenth-century carver stuck in the twenty-first century. Be all modern if you like. Another ships carver reminded me that most people do not get close eough to smell the eagle; all these things in full size are meant to be viewed from a distance. Here are some examples of eyes:

Love and Hate

Warburton knew I would never be a great designer. So he tried fundamental things with me—white space to balance designs and rule of thirds. Being he was an ecclesiastical carver, he was very concerned that I understand the traps you fall into when your block limits you to a constrained and stiff composition. There is no rule that he taught me that I have not broken on my own until I, finally, said, “that’s what he meant.” Well, at least I learned the lesson. It is the curse of the self-taught that our learning process is irregular. Good designers know when and how to bend and break the rules. I think that’s one of the things that makes great art and craft. The rest of us stumble until we get it right.

Kingfisher II

The photo I am showing here is one of my favorites, despite its apparent flaws. It was a practice piece that I liked. After it kicked around the shop for a couple of years, I decided to frame it. Being that it was an odd size, I made the frame from scrap around the shop.
The frame overwhelms the carving in color and size; and the piece ( being meant for practice) never was designed to have a proper border around it. Every time I look at the carving, I get reminded of how pleased I was with the effects of carving in cherry, and how much I liked the steam fishing vessel it represents. I also get irritated by the lack of compositional balance caused by the lack of space around the ship.
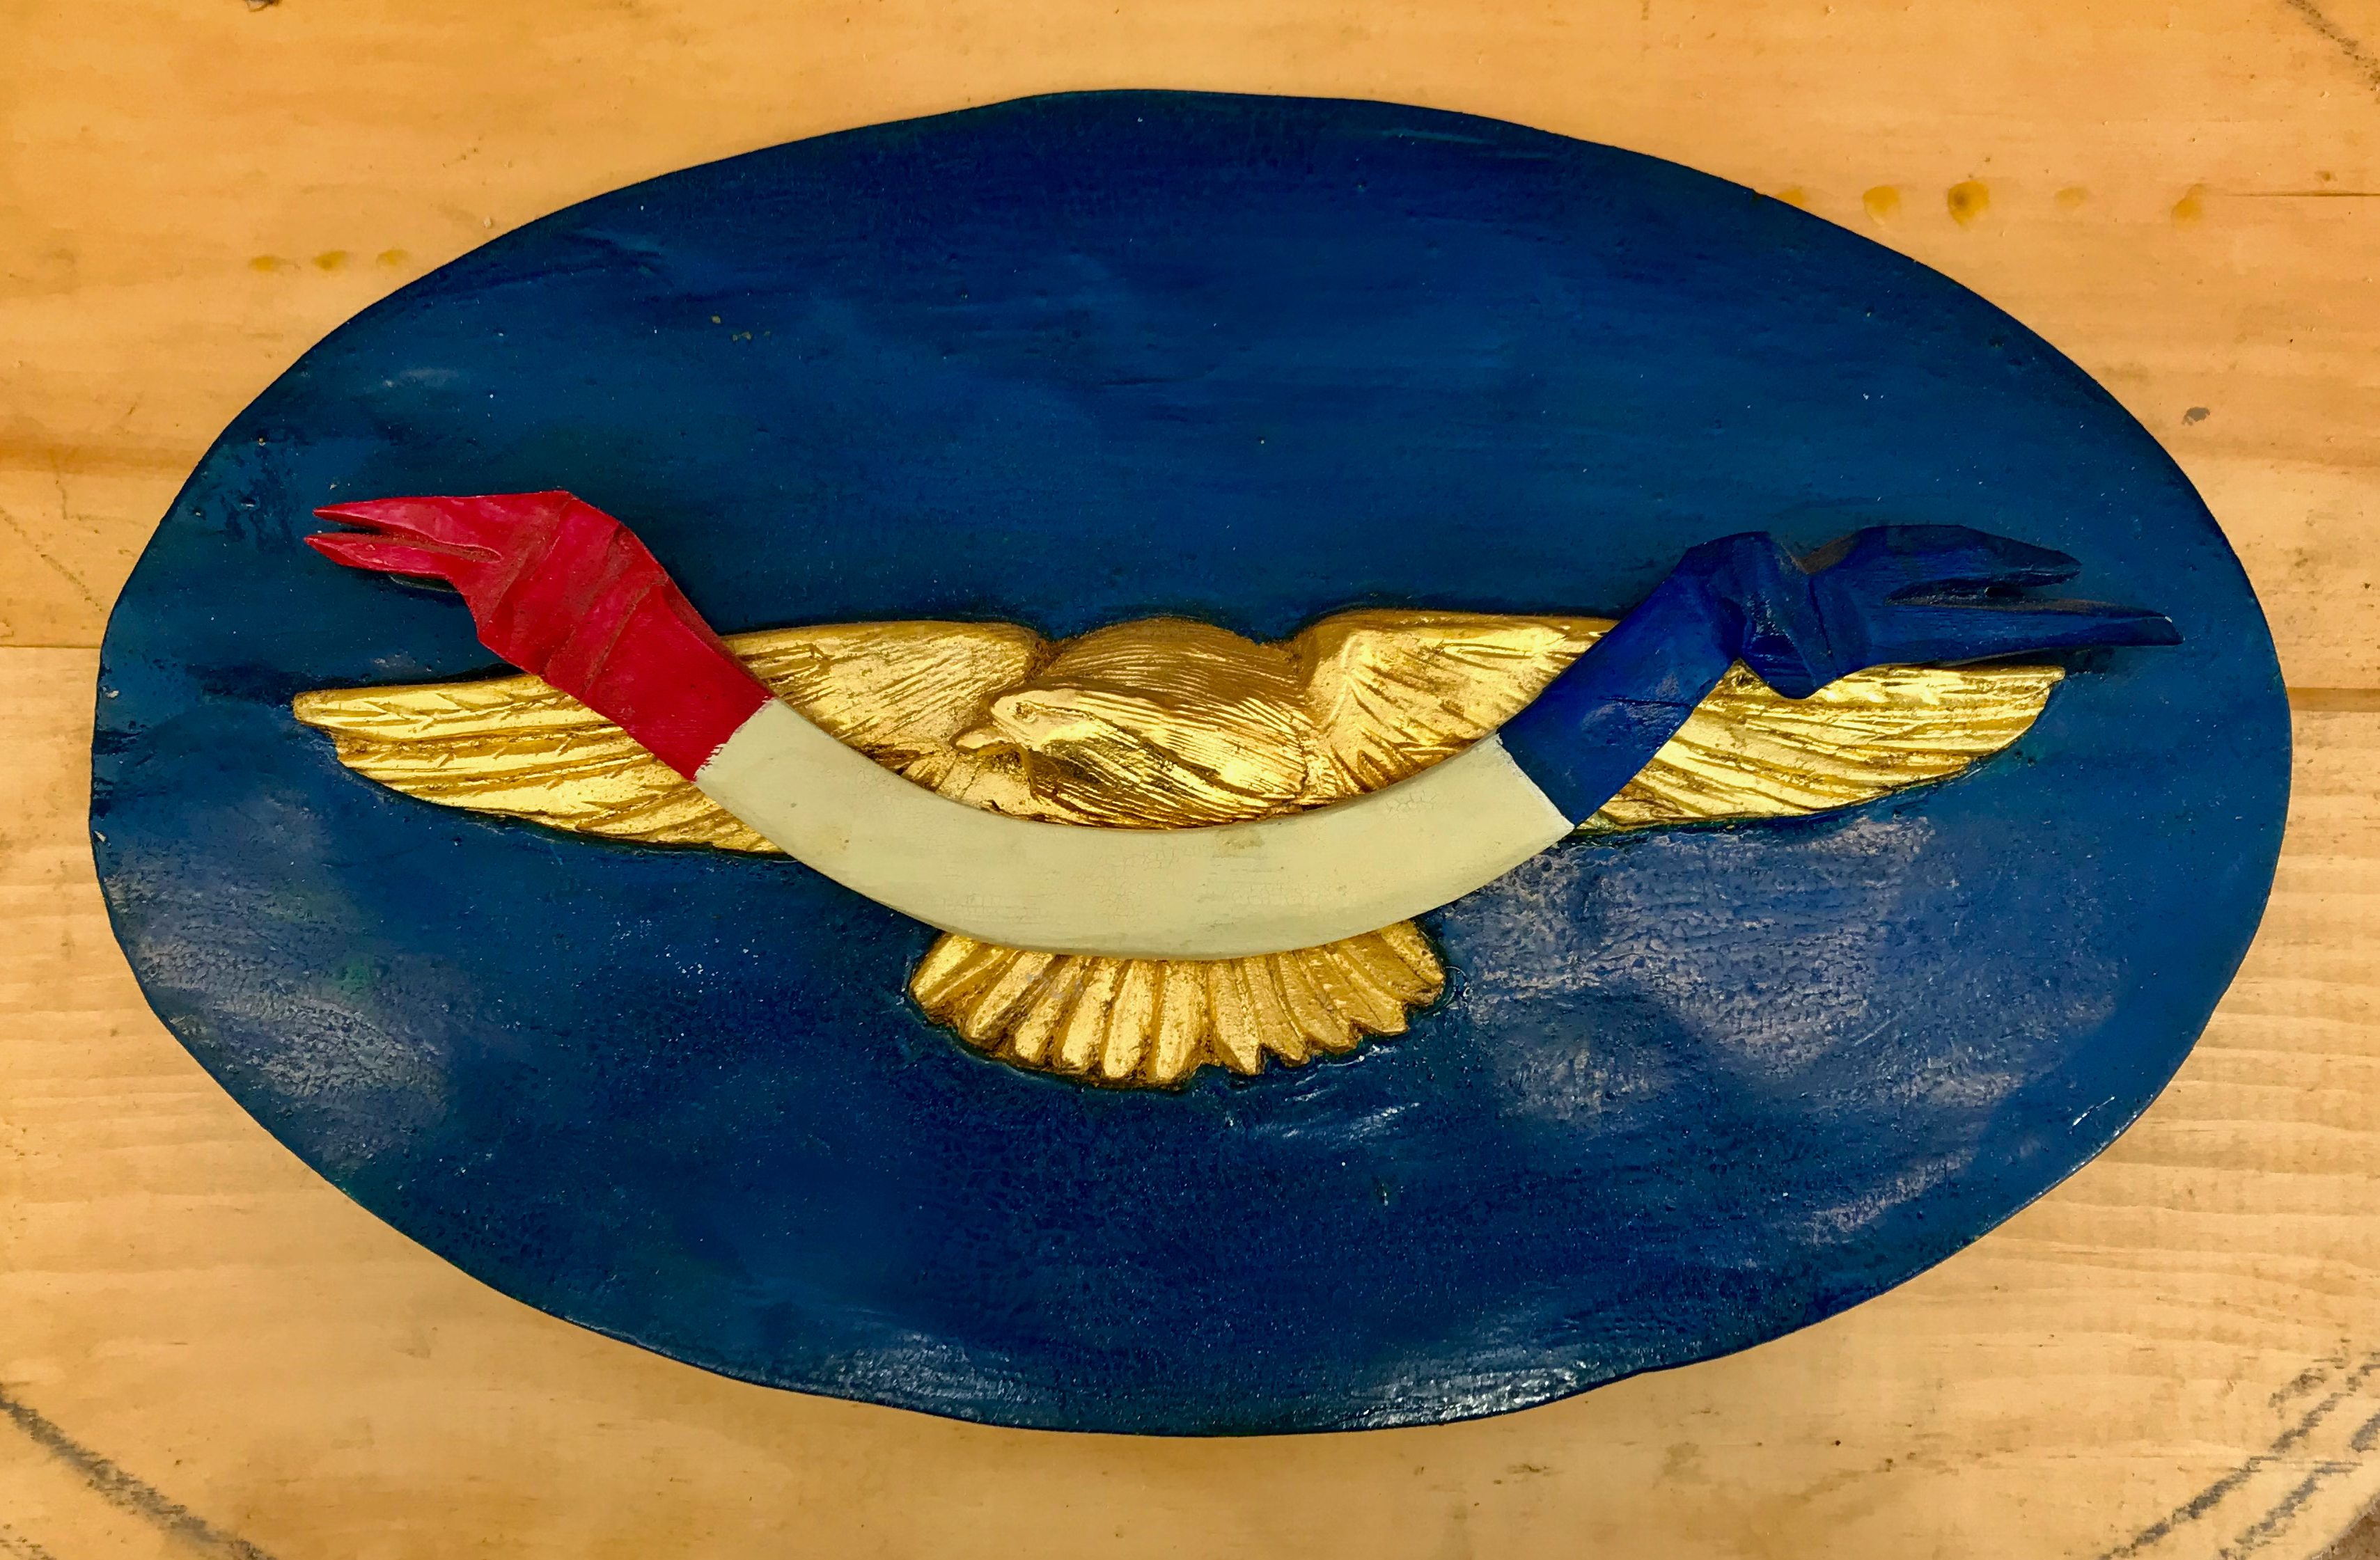
Because of the good and bad of the design, it’s a piece I love and hate.

Sources

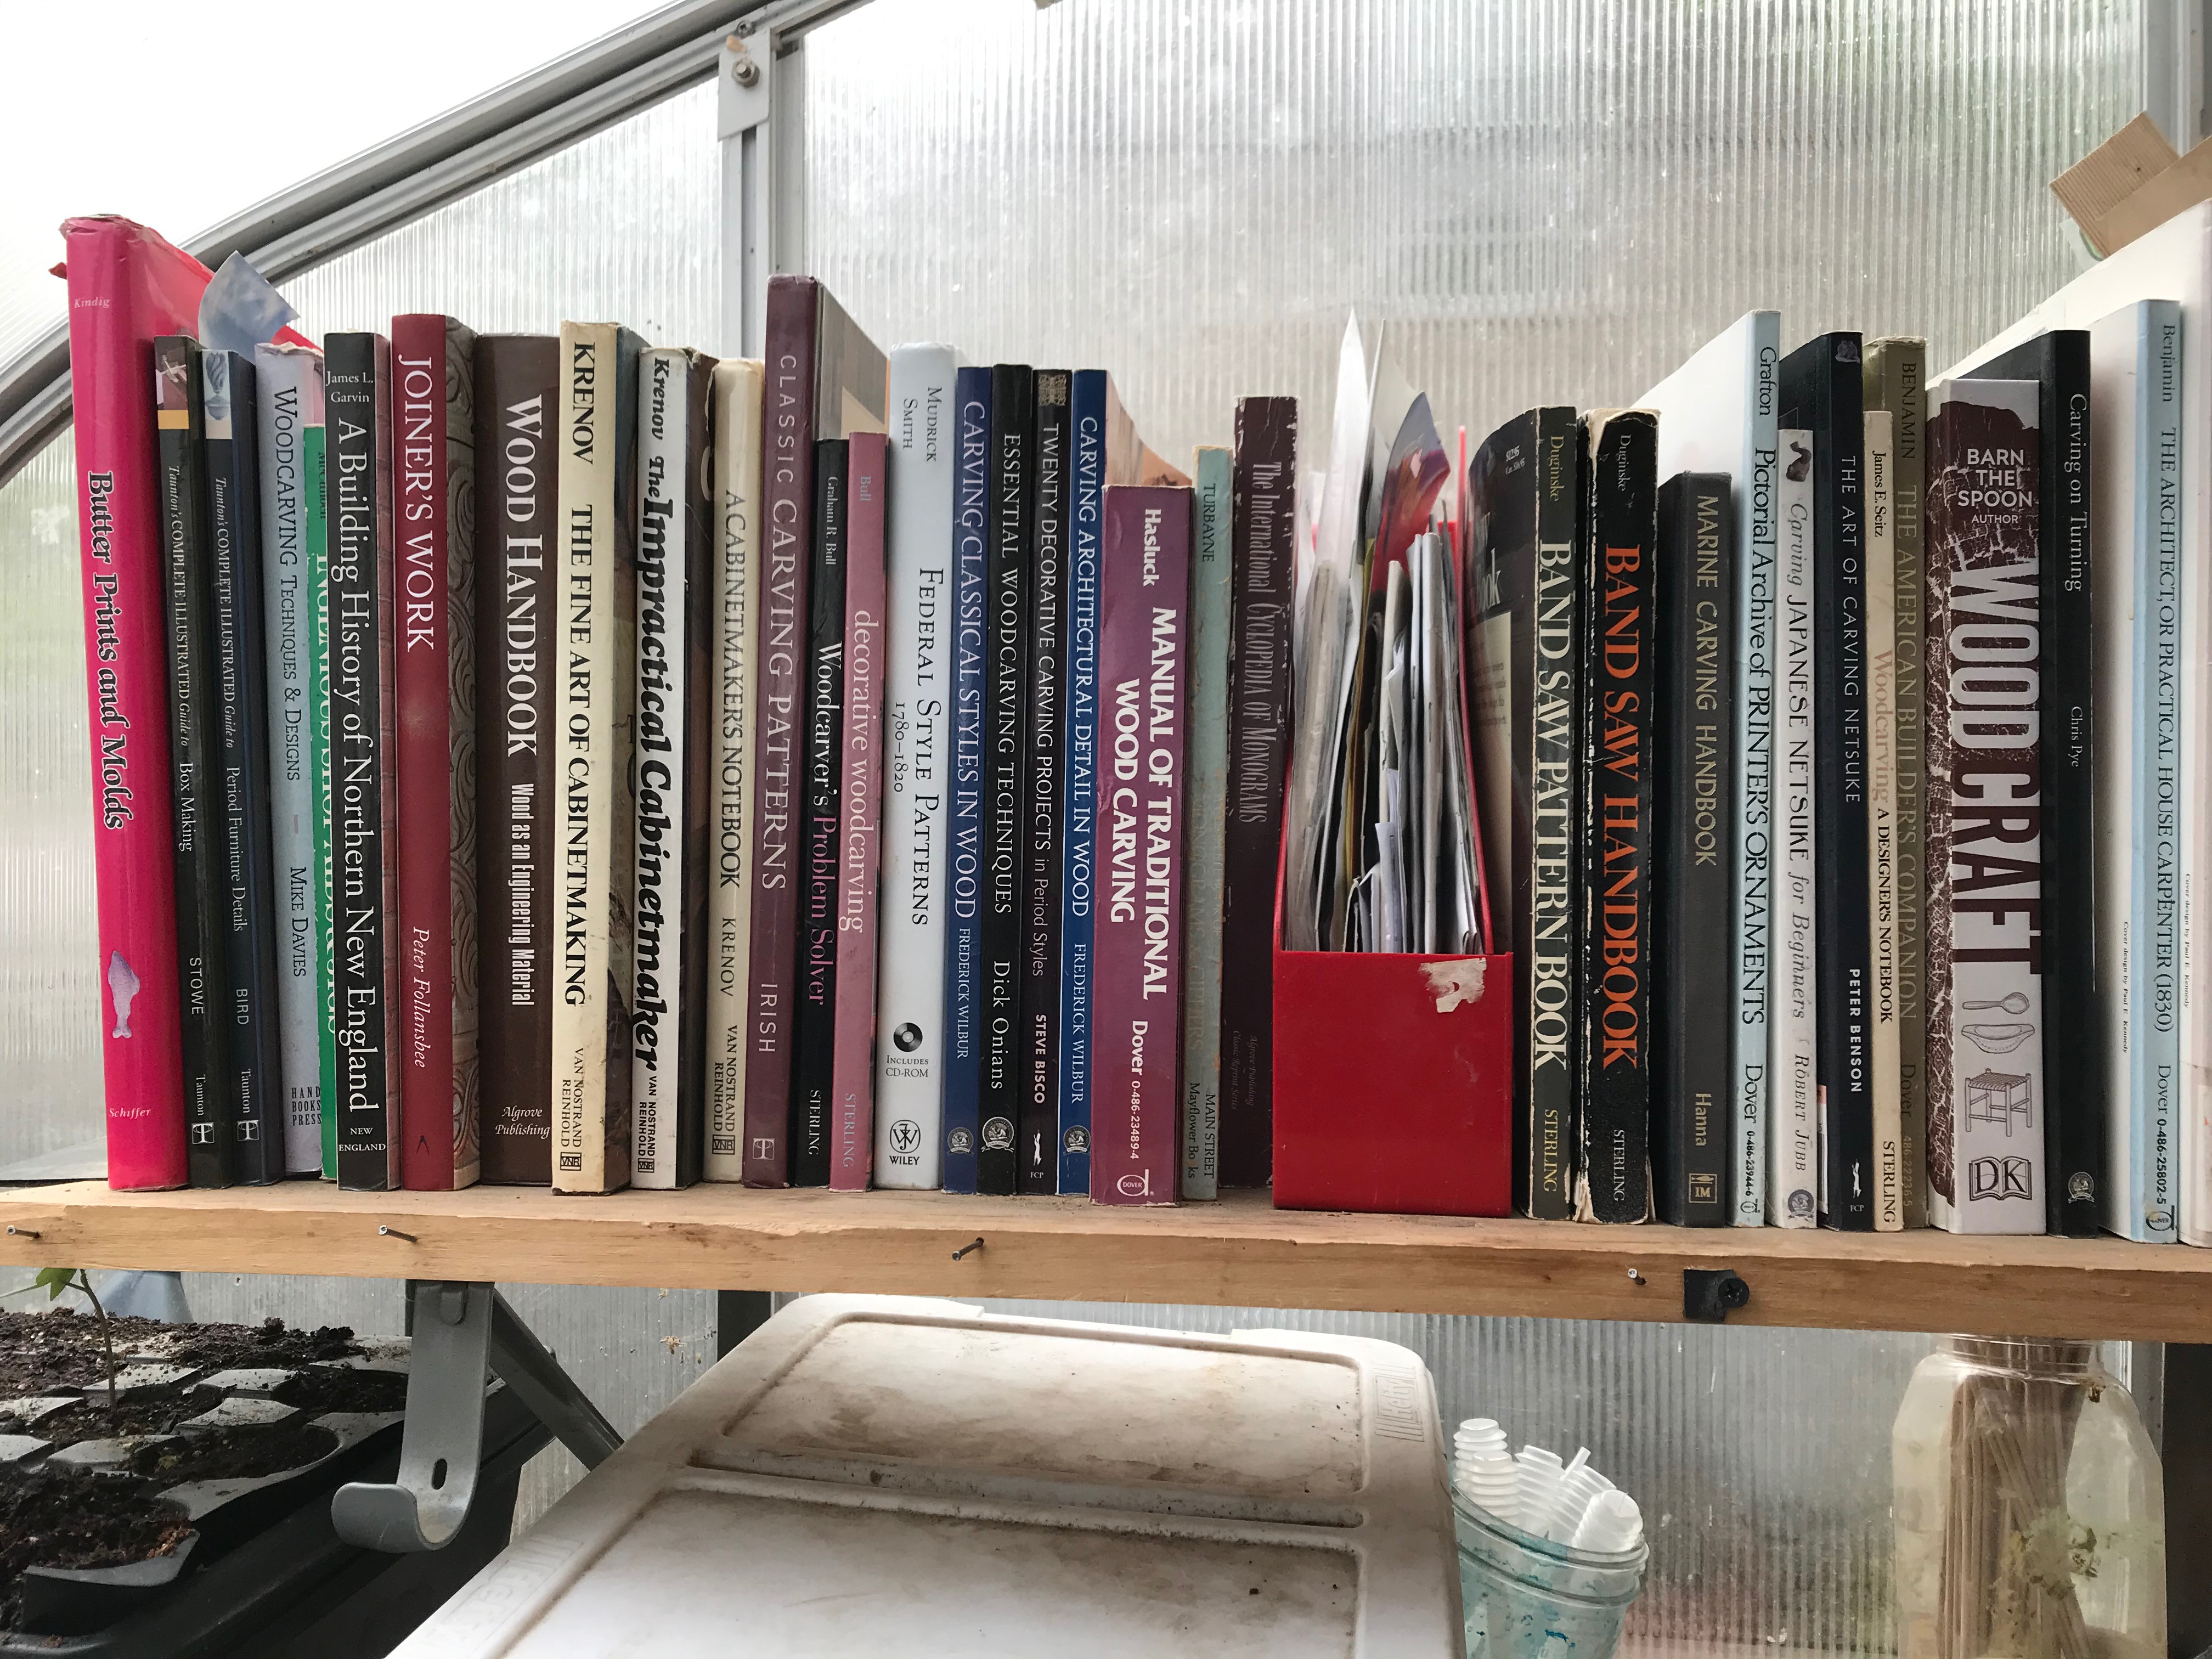
In January, I started what I thought to be a quick project for a portrait of the halibut Schooner Republic. There was not much online where I began, and even less available in terms of print sources. My collection at home also came up dry. I was able to complete the project in March but wished that I had better documentation. 

Typically, I budget about a quarter of my project time to research, unless the portrait is a well documented one design, or a small boat for which sufficient illustrations or plans are available. It’s when you start work on less documented material that you wind up in the weeds. The halibut schooner was in the deep underbrush.

Regardless of the craft you serve, there are documentation needs: patterns, illustrations, methods, notes on materials, or historical information. Over the years, I’ve grown a small but healthy collection of print and visual content. My urges to add to this depend on my current and proposed projects and general interest. Practice a craft long enough, and you wind up with at least a small library. If you love books, the affliction is much worse. Obtaining the material that you need can be a bit of a circus.

You might notice that booksellers don’t tend to hold onto extensive stock these days, and publishers have little motivation to make excess print runs for materials that they might have to sell as remainders. I suggest that you haunt library sales, befriend local used book shops, and support independent booksellers wherever you find them. But, this method of growing your collection can be hit or miss. If you are a chronic browser, this is a great way to expand your collection slowly. It won’t yield specific results when you need something for a project now.

As a sidenote for the public library user: I love libraries. However, except specialty libraries, like those associated with Maritime Museums, they don’t tend to have much for me. Sadly, every year I buy books for my collection that were initially library copies but got withdrawn and sold.

 Which, of course, leads you to the internet and the realm of search engines. Depending upon the popularity of what you are researching, sources can be very rich or impoverished. For those of you who claim that they can always find whatever they need online, I’d posit that whatever it is they are doing, it is what many others are doing as well. Take an excursion further afield, and you will soon find out that the internet is not an equal opportunity provider.

This precisely why sites like Biblio, Abe books, Thriftbooks, and other places are your friends. Their search engines index the holdings of associated book dealers. The descriptions can be sparse. So, you have to be on top of your game in terms of what you are seeking. The photo I am using for this post shows part of the workshop library. I bought a number of these books used online.

Here are a couple of pointers:

1.) learn to read and evaluate the descriptive methods sellers use to describe books – keep them honest – if a book is described as having a tight binding, but shows up with loose pages complain.

2.) compare listings among various booksellers for price, condition, and shipping.

3.) Research your purchases. Not all sellers describe the contents of the book accurately. 

4.) Develop wish lists for content that you are seeking. It may be available next month.

A current project I am working on is a portrait of a 1900 Victorian Steam Yacht. Thin online prospects and lean sources in my library led me to four online book dealers. I was able to find several low priced additions to the library that fill in some of my collections deficiencies. As the books arrive, I can fill the knowledge gaps in designing and executing the steam yacht.

A post on that should be forthcoming.

Share

Share; be generous.
It began with my mentor pointing out my stinginess. I had little money for presents, but he countered that I had my craft: “Give it away; it will come back to you.” I ignored his advice. No, it wasn’t a miserable holiday. People were generous to me. Eventually, it began to sink in that he was correct. But for years, I was not creating and had little to give. So like many of us, I bought for others.
When I re-established the business in the early ’90s, I created lists of things I needed to improve on before opening my business – right at the top was lettering.
I’ve always needed to link learning with meaningful work – so I planned projects that targeted lettering proficiency but would then become presents. The photo shows two examples. I made signs and other carved projects for a long list of nieces, nephews, sons, and daughters of friends, and of course, my kids. By Christmas, I had mastered all the serifs, ascenders, and descenders needed and made a lot of people happy. Cost? Almost nothing. I used odd cuts of wood; the only expenses had been for paint, glitter, and varnish.
My present to myself was a gift of increased skills and sharing the happiness I had created.
As I write this, I am planning some new products; the spring is always my most productive time for new things. That means it’s a product development and gift planning time. Need free product development advice; give a gift and ask: ” Terry, these boxes are something I’m developing. I’d love to get your input on them.”
Dare I say it! Do good while doing well? Try it; making someone happy is an excellent use for a craft skill.

Create

We so often admire the complex and then seek out and appreciate the simple. The examples I have chosen to show are small carvings from post-war occupied Japan. Both feature a popular theme in Japanese art; Mount Fuji.
The simplicity of the creative technique is central here. The entire subject gets rendered with no more than the bare required cuts, and for that matter, the bare number of tools. Although the artist makes multiple cuts, the amount is minimal. We can also see this at work in brush calligraphy techniques where the subject is composed and executed in one continuous stroke.


To be effective in this requires two things: a thorough knowledge of the capabilities of your tools; and mastery of your tools. As one of my senseis says, “and that’s all there is to it.”
One mentor of mine once knocked out about a foot and a half of fancy molding out of what was scrap wood. He cut all the cuts needed from one tool, moved on to the next, and so on in succession—the complexity of the finished piece derived from the repetitive simple cuts he made in the correct sequence.
Well, I don’t know about you, but I can tell you that I am still working on this, and probably will be until it’s time to put away my tools. Like so many creative endeavors mastering the complex depends on learning the very basic.

%d